
Writer Deck
Writer Deck
| Revision | Service | Quoted Duration | Actual Duration | Rating |
|---|---|---|---|---|
| A | CAD Design | 16 Days | 16 Days | 5 |
Buyer Request
Design a custom device enclosure that can be placed on a stand and hooked onto a provided keyboard in order to use as a digital type writer via an Amazon kindle tablet or a custom Raspberry Pi 4 based device.


Raspberry Pi Enclosure Design
The enclosure needed to be able to fit:
- Raspberry Pi 4 w/ a Top Mounted Fan
- Lithium Ion Battery
- e-Paper Driver HAT
- 7.5” Display
Additionally, the enclosure was to be 3D printed and assembled utilizing the least possible amount of fasteners or other non 3D printed materials.
Making Everything Fit
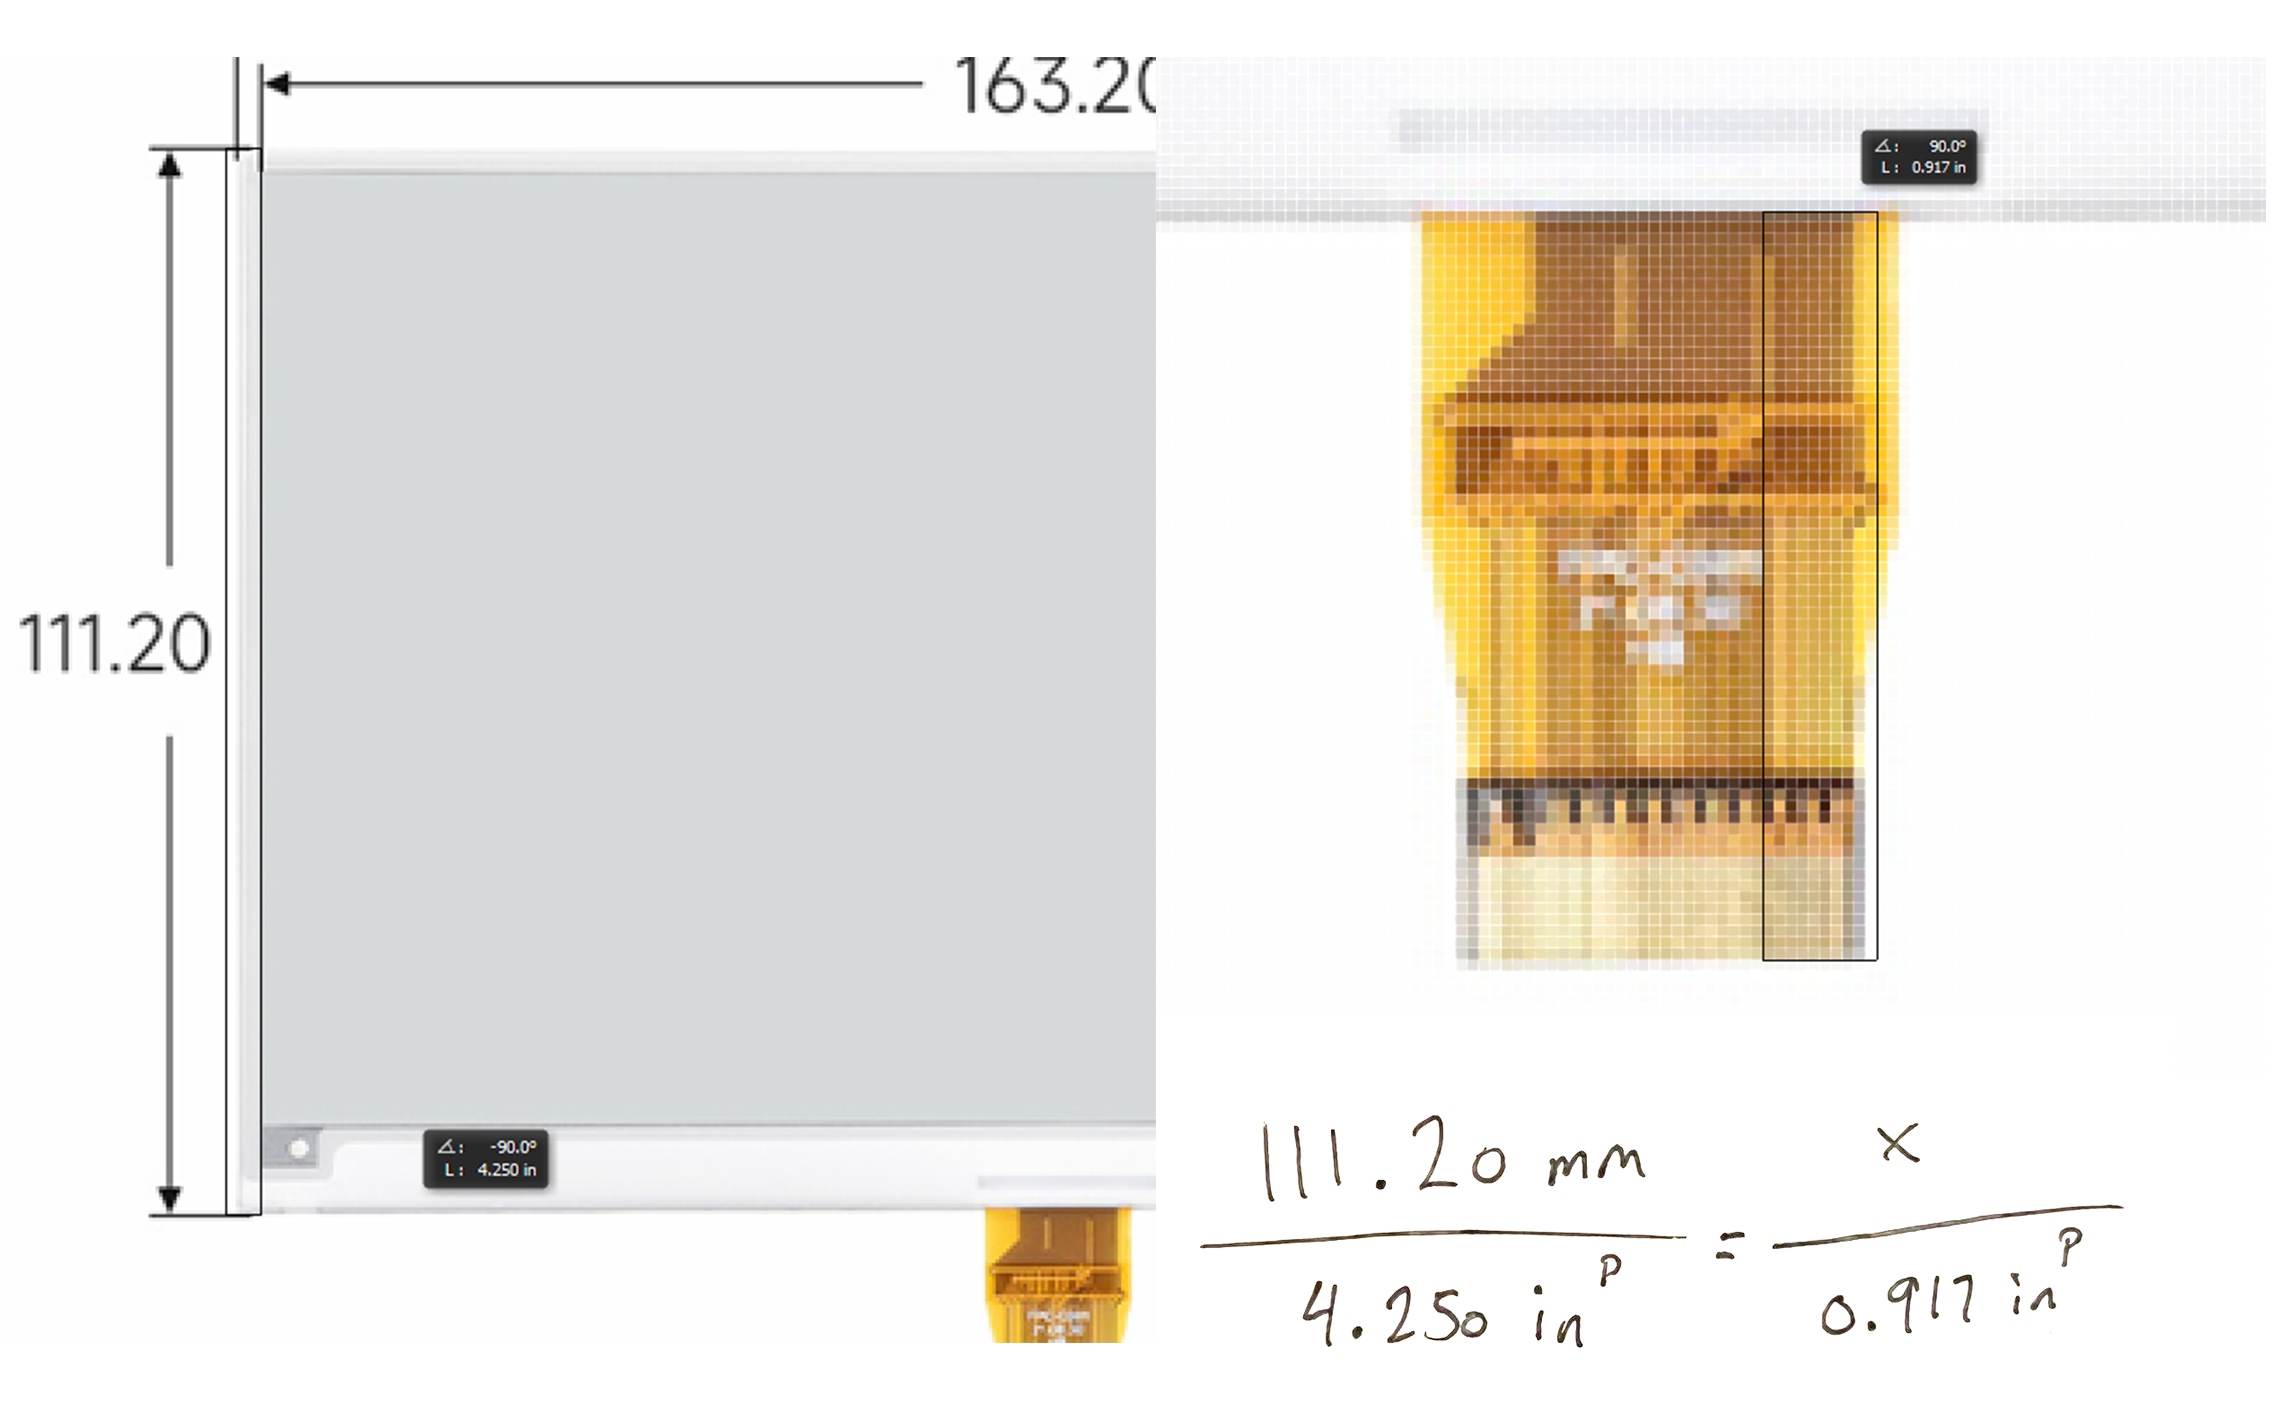
While I did have most of the measurements I needed, one of the biggest challenges was finding the dimensions that I didn’t have.
For a few different components I was able to ascertain the necessary information by comparing the measured values in photoshop to the known dimensions shown in the provided diagrams. Utilizing this technique allowed for a more detail oriented design process which was crucial for insuring that components fit where they were needed.

3D Printing Snap-fit Joints
In order to avoid the use of non 3D printed fasteners, parts were secured together with snap-fit joints and mounting pegs.
Extra emphasis was placed on the ease of access to components and the ability to disassemble should the need to make changes arise.
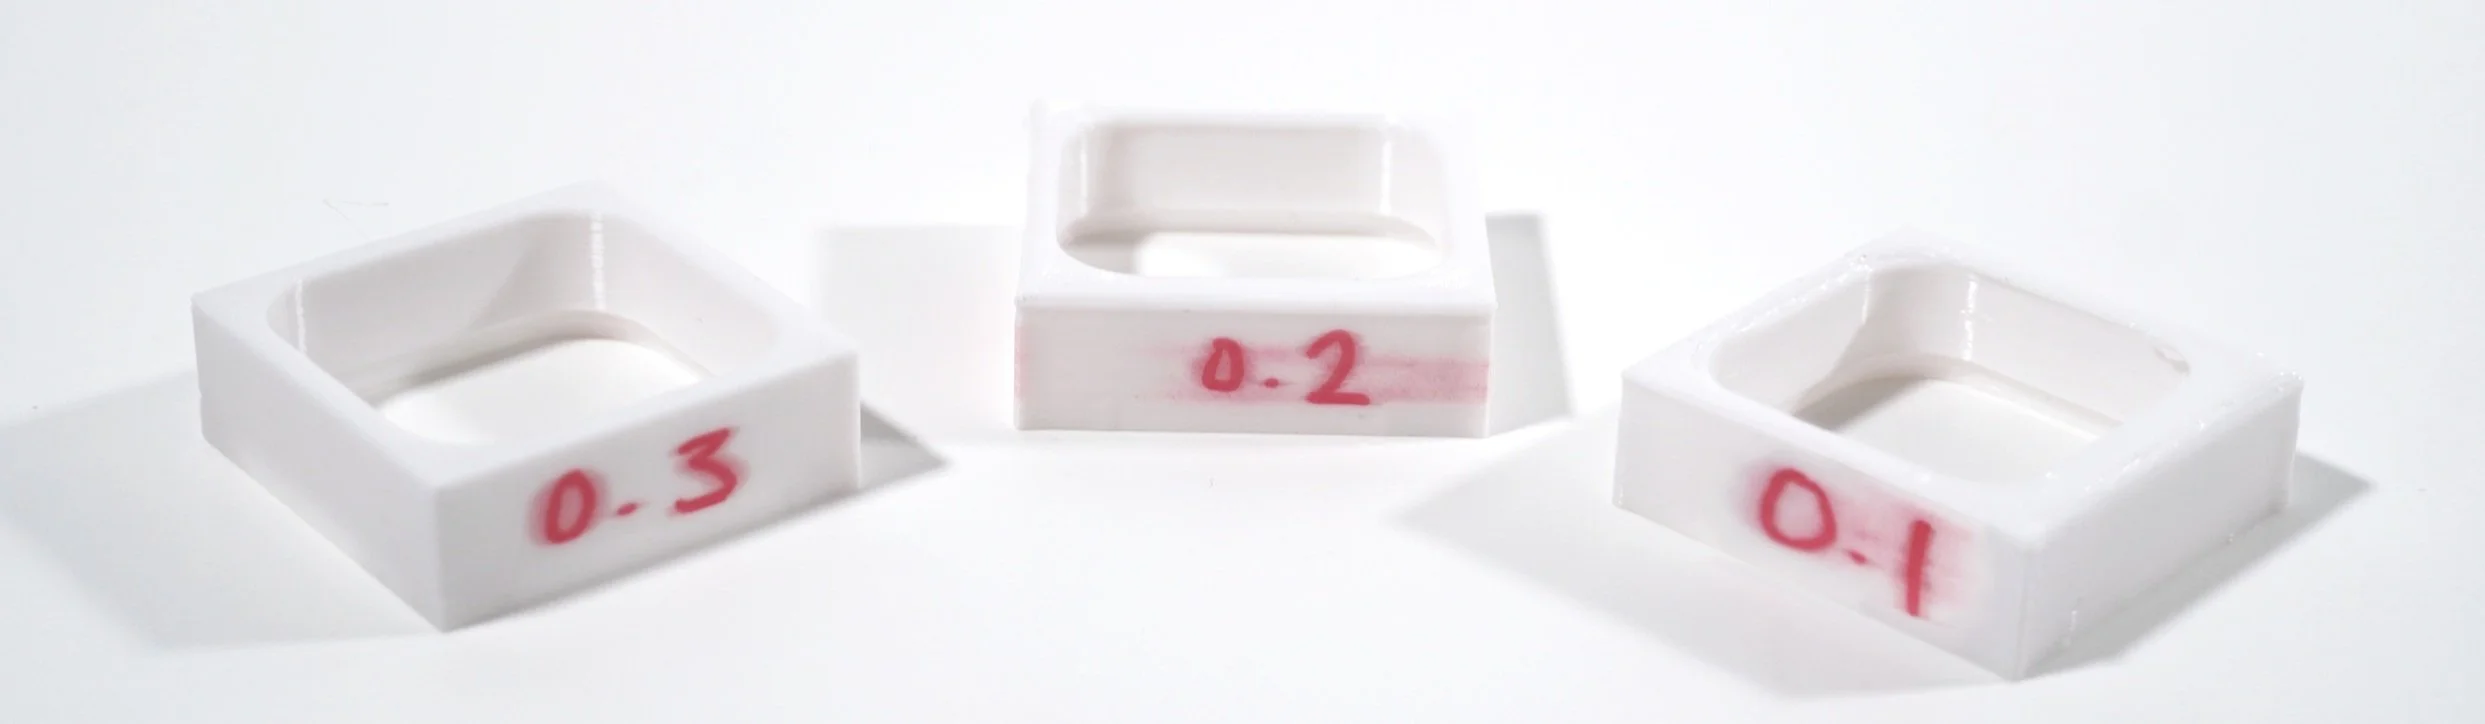
Having never designed snap-fit joints before, I tested various shapes and clearances to understand how they work, how to construct them and how to reliably print a secure but detachable assembly.
The snap-fit contour was essentially a rounded off rectangle with a triangular slot which would directly interface with an opposite channel in the mating part. In order to allow for the parts to be disassembled, it was important to allow for a small offset between the two pieces. After testing offsets of 0.1 mm, 0.2 mm and 0.3 mm, it was found that the 0.2 mm offset would be the most suitable given that the 0.1 mm offset was too tight and the 0.3 mm was too loose.
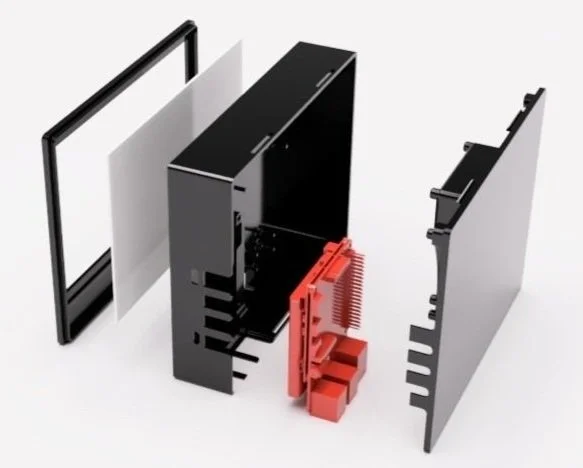

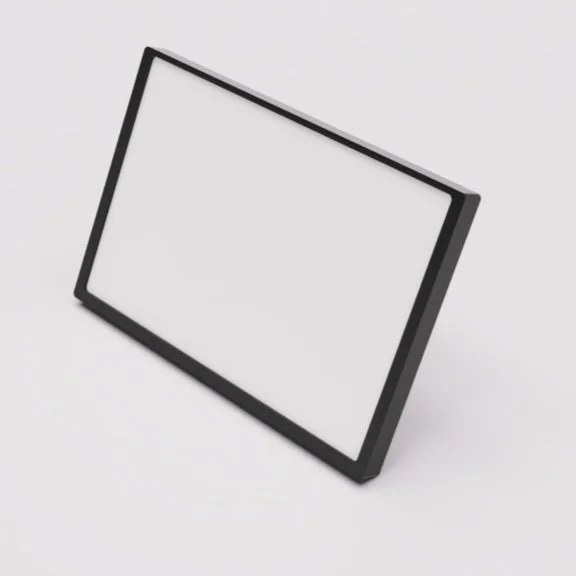
To accommodate all of the components, a 3 panel structure was designed.
The display was fit between the cover plate and the mid plate with minimal clearance. Not only did the cover plate act to secure the display against the mid plate but it also had an internal frame which would keep the display from sliding out of place.
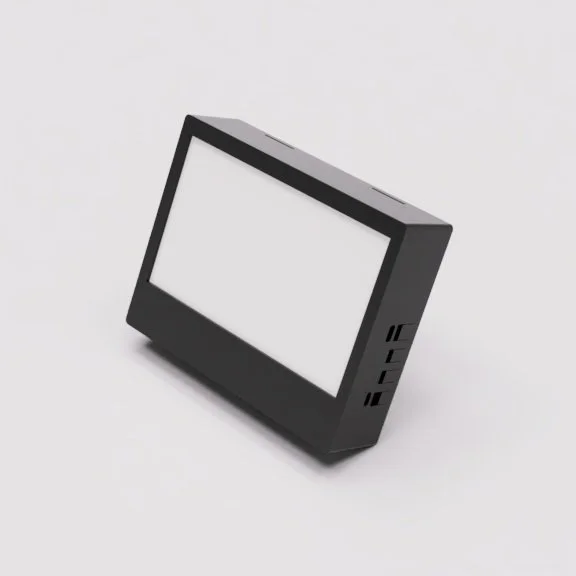
The mid plate housed the remaining electronics, featuring raised pegs to secure the Raspberry Pi 4 and the e-Paper Driver hat boards, along with a specially designed raised frame for the Raspberry Pi 4 and the Lithium Ion battery assembly. Additionally, the sides of the mid plate had cutouts for various ports, enabling the boards to slide in easily for simple assembly and allowing for easy access from the side and bottom of the Writer Deck.
The back plate served the primary purpose of enclosing the raised pegs and securing the openings made to accommodate the ports. It too snapped into the mid plate via joints at the top and bottom of the enclosure, however the back plate used cantilever snap joints instead of the more annular design previously used.
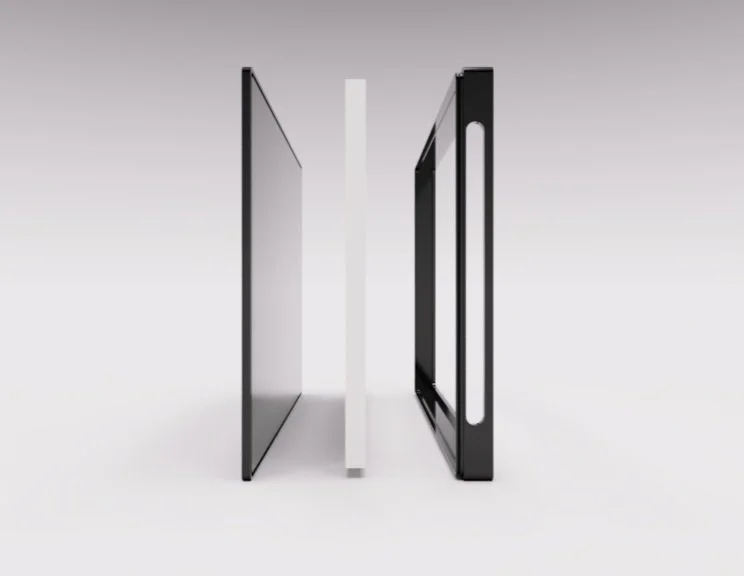
Tablet Enclosure Design
A custom designed enclosure to hold an Amazon Kindle Tablet to be used as a display.
In comparison to the enclosure for the Raspberry Pi 4 display, the enclosure for the Amazon Kindle Tablet was relatively simple. The entire assembly consists of a cover plate with a cutout for the speakers and charging port and a back plate to secure the tablet against. I utilized the same snap-fit joint contour and 0.2 mm offset.

Writer Deck Stand Design
The Writer Deck’s stand needed to be able to elevate the tablet or Raspberry Pi display while hooking onto the provided keyboard and sustaining a slight backwards tilt.
Initially, the idea was to create slots on each of the device enclosures so they could be mounted directly onto the stand at the desired angle. The main challenge with this approach however would be ensuring integrity of the structure while also accommodating both the tablet and custom Raspberry Pi device.

Instead of further complicating the design of each enclosure separately, I opted to instead create a plate that is able to accommodate both. The mounting plate of the stand has two cavities: a small but deep cavity for the Raspberry Pi device and a wider but thin cavity for the Kindle tablet.
This mounting plate can then be connected to a separate hook and two legs. The legs are designed to raise the device above the 2 inch tall keyboard and tilt back the display by 25 degrees. Each piece was intentionally made separate to simplify the 3D print process and all of the parts were designed to snap together further removing the need for fasteners.


There were so many unique challenges presented in this project that made it incredibly interesting to work on.
It becomes fairly easy to depend on fasteners or other post-print corrections to make up for certain design oversights or shortcomings. Given that a main constraint of this project was to utilize as few non-printed components as possible, making sure that everything was designed to work right off the print bed was extremely important. The last thing I would want is to have the buyer have to reprint multiple components for one to eventually work.
Being more pragmatic and diligent in my review of dimensions and measurements as well as frequent testing helped result in a better end product that would require fewer edits. It truly helped me understand the obstacles when working with parts that I can not measure myself and gave me insight into challenges associated with mounting electronics.
Not only did I develop better habits and foresight but I also was able to learn how to print snap-fit joints and how to design tight tolerance parts with the best clearance. This specifically is something that has completely changed my tool set for projects moving forward.
Approved for use on portfolio. Technical Drawings available at request.