
Arduino LCD Control Panel
Arduino LCD Control Panel
| Revision | Service | Quoted Duration | Actual Duration | Rating |
|---|---|---|---|---|
| A | CAD Design | 10 Days | 9 Days | 5 |
| B | CAD Design | 14 Days | 12 Days | No Rating |
Buyer Request
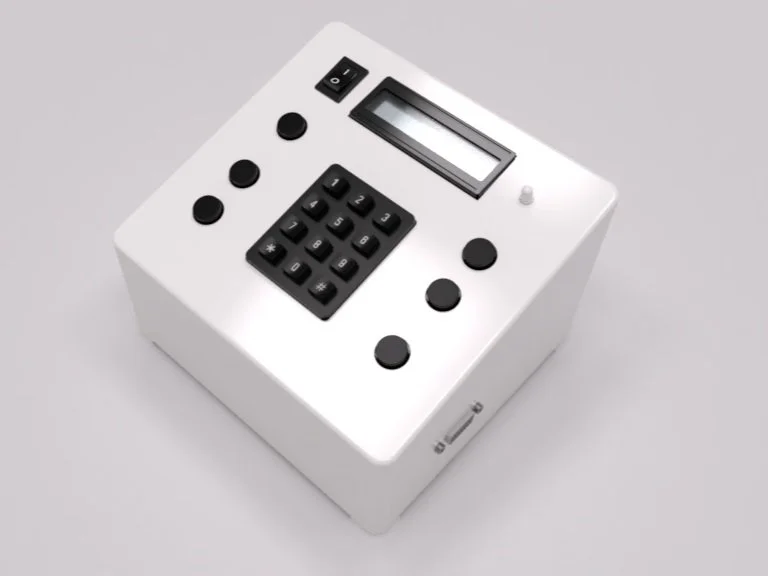
Develop a compact computer system within the specified constraints, powered by an Arduino Mega, featuring six buttons and a keypad for user input.
Design Considerations
All components must fit within the specified wedge-shaped structure, measuring 16 cm x 10 cm x 14.5 cm.
Internal components should be designed for easy access, with the battery being replaceable without requiring full disassembly.
Components are to be spaced in such a way that ample room is provided for electrical connections and the appropriate fasteners.
The entire chassis must be designed for reliable and straightforward 3D printing.
Additionally, while most component measurements were provided, some dimensions were less clearly defined.


Design Breakdown
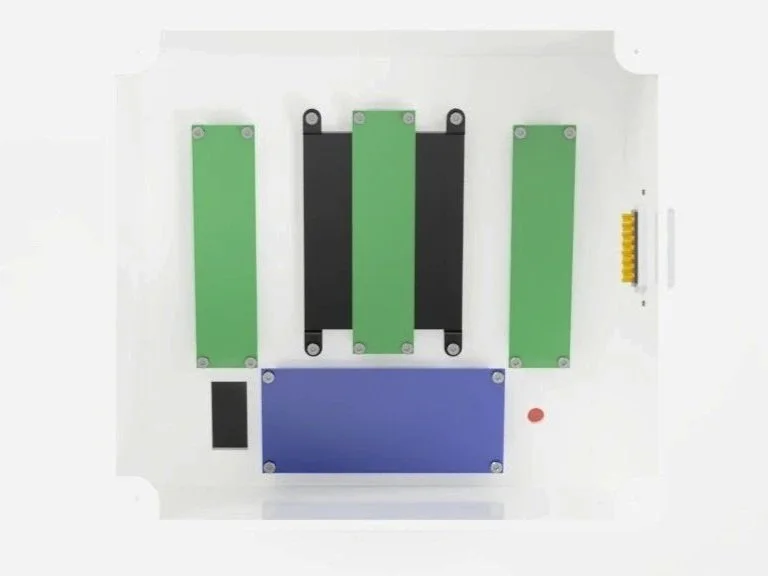

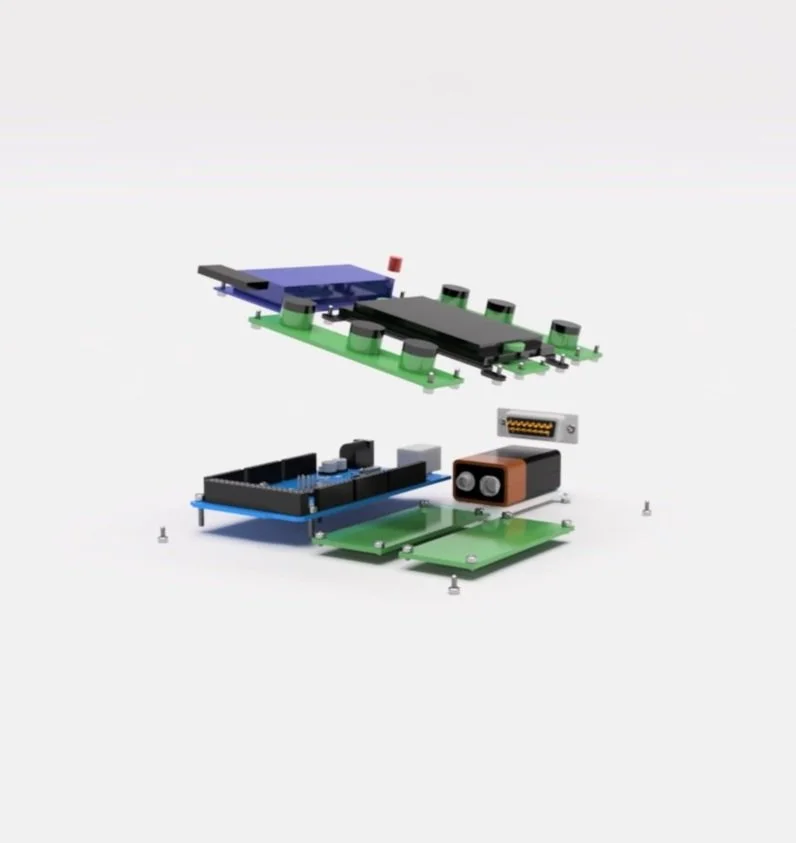
Base Plate
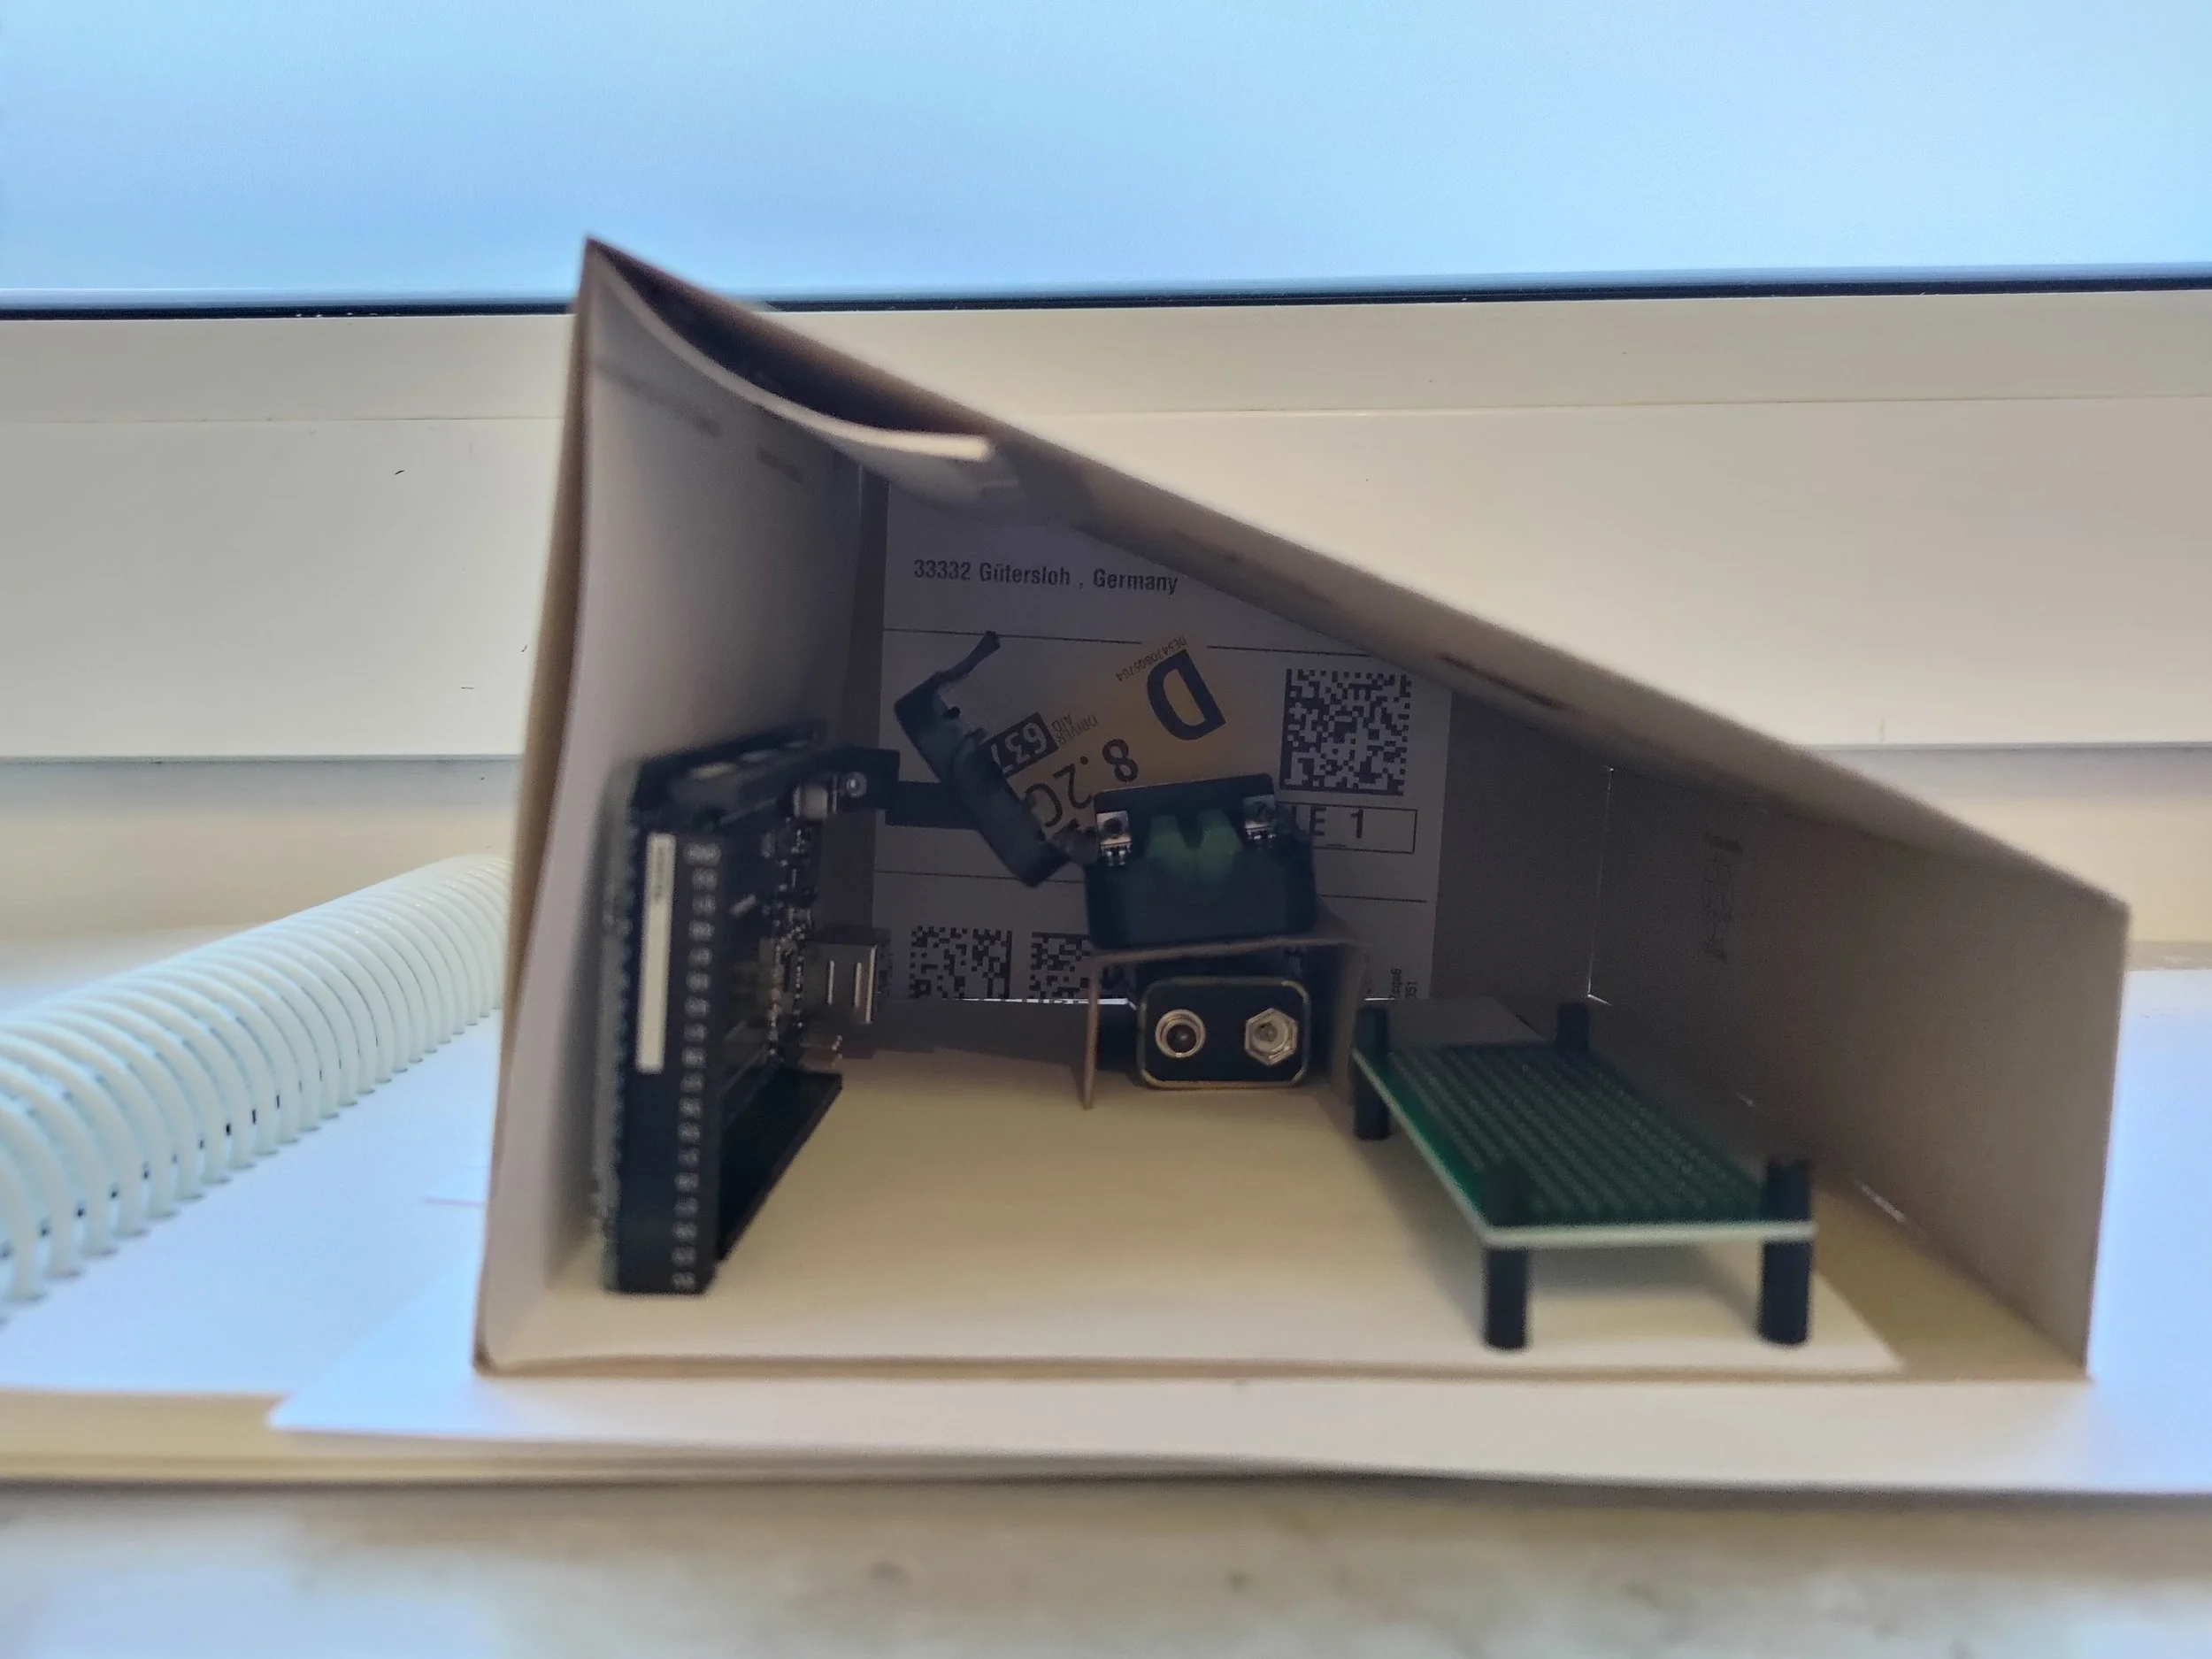
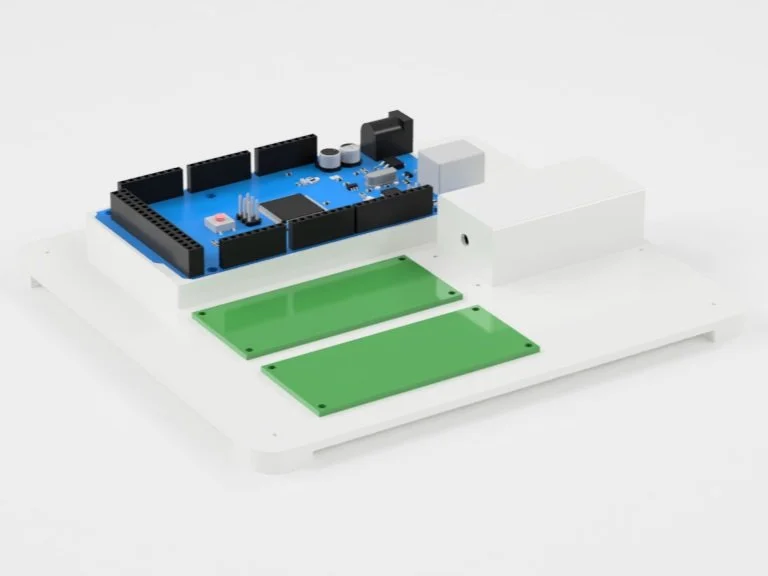
A removable bottom panel that provides a mounting location for the Arduino Mega and access to the 9V battery.
Designing the device to have a separate base plate allows for easy access to internal components via the four counterbored screws located within the feet at each corner of the plate.
The Arduino Mega is mounted on a raised, dedicated raised mounting block to allow the user better access to all input and output connections as well as provide additional structural support to the component.
The 9V battery can be installed or replaced in two ways: it can be placed in the battery channel from the side while the plate is removed or it can be accessed via a hatch at the bottom of the plate.


Cover Shell
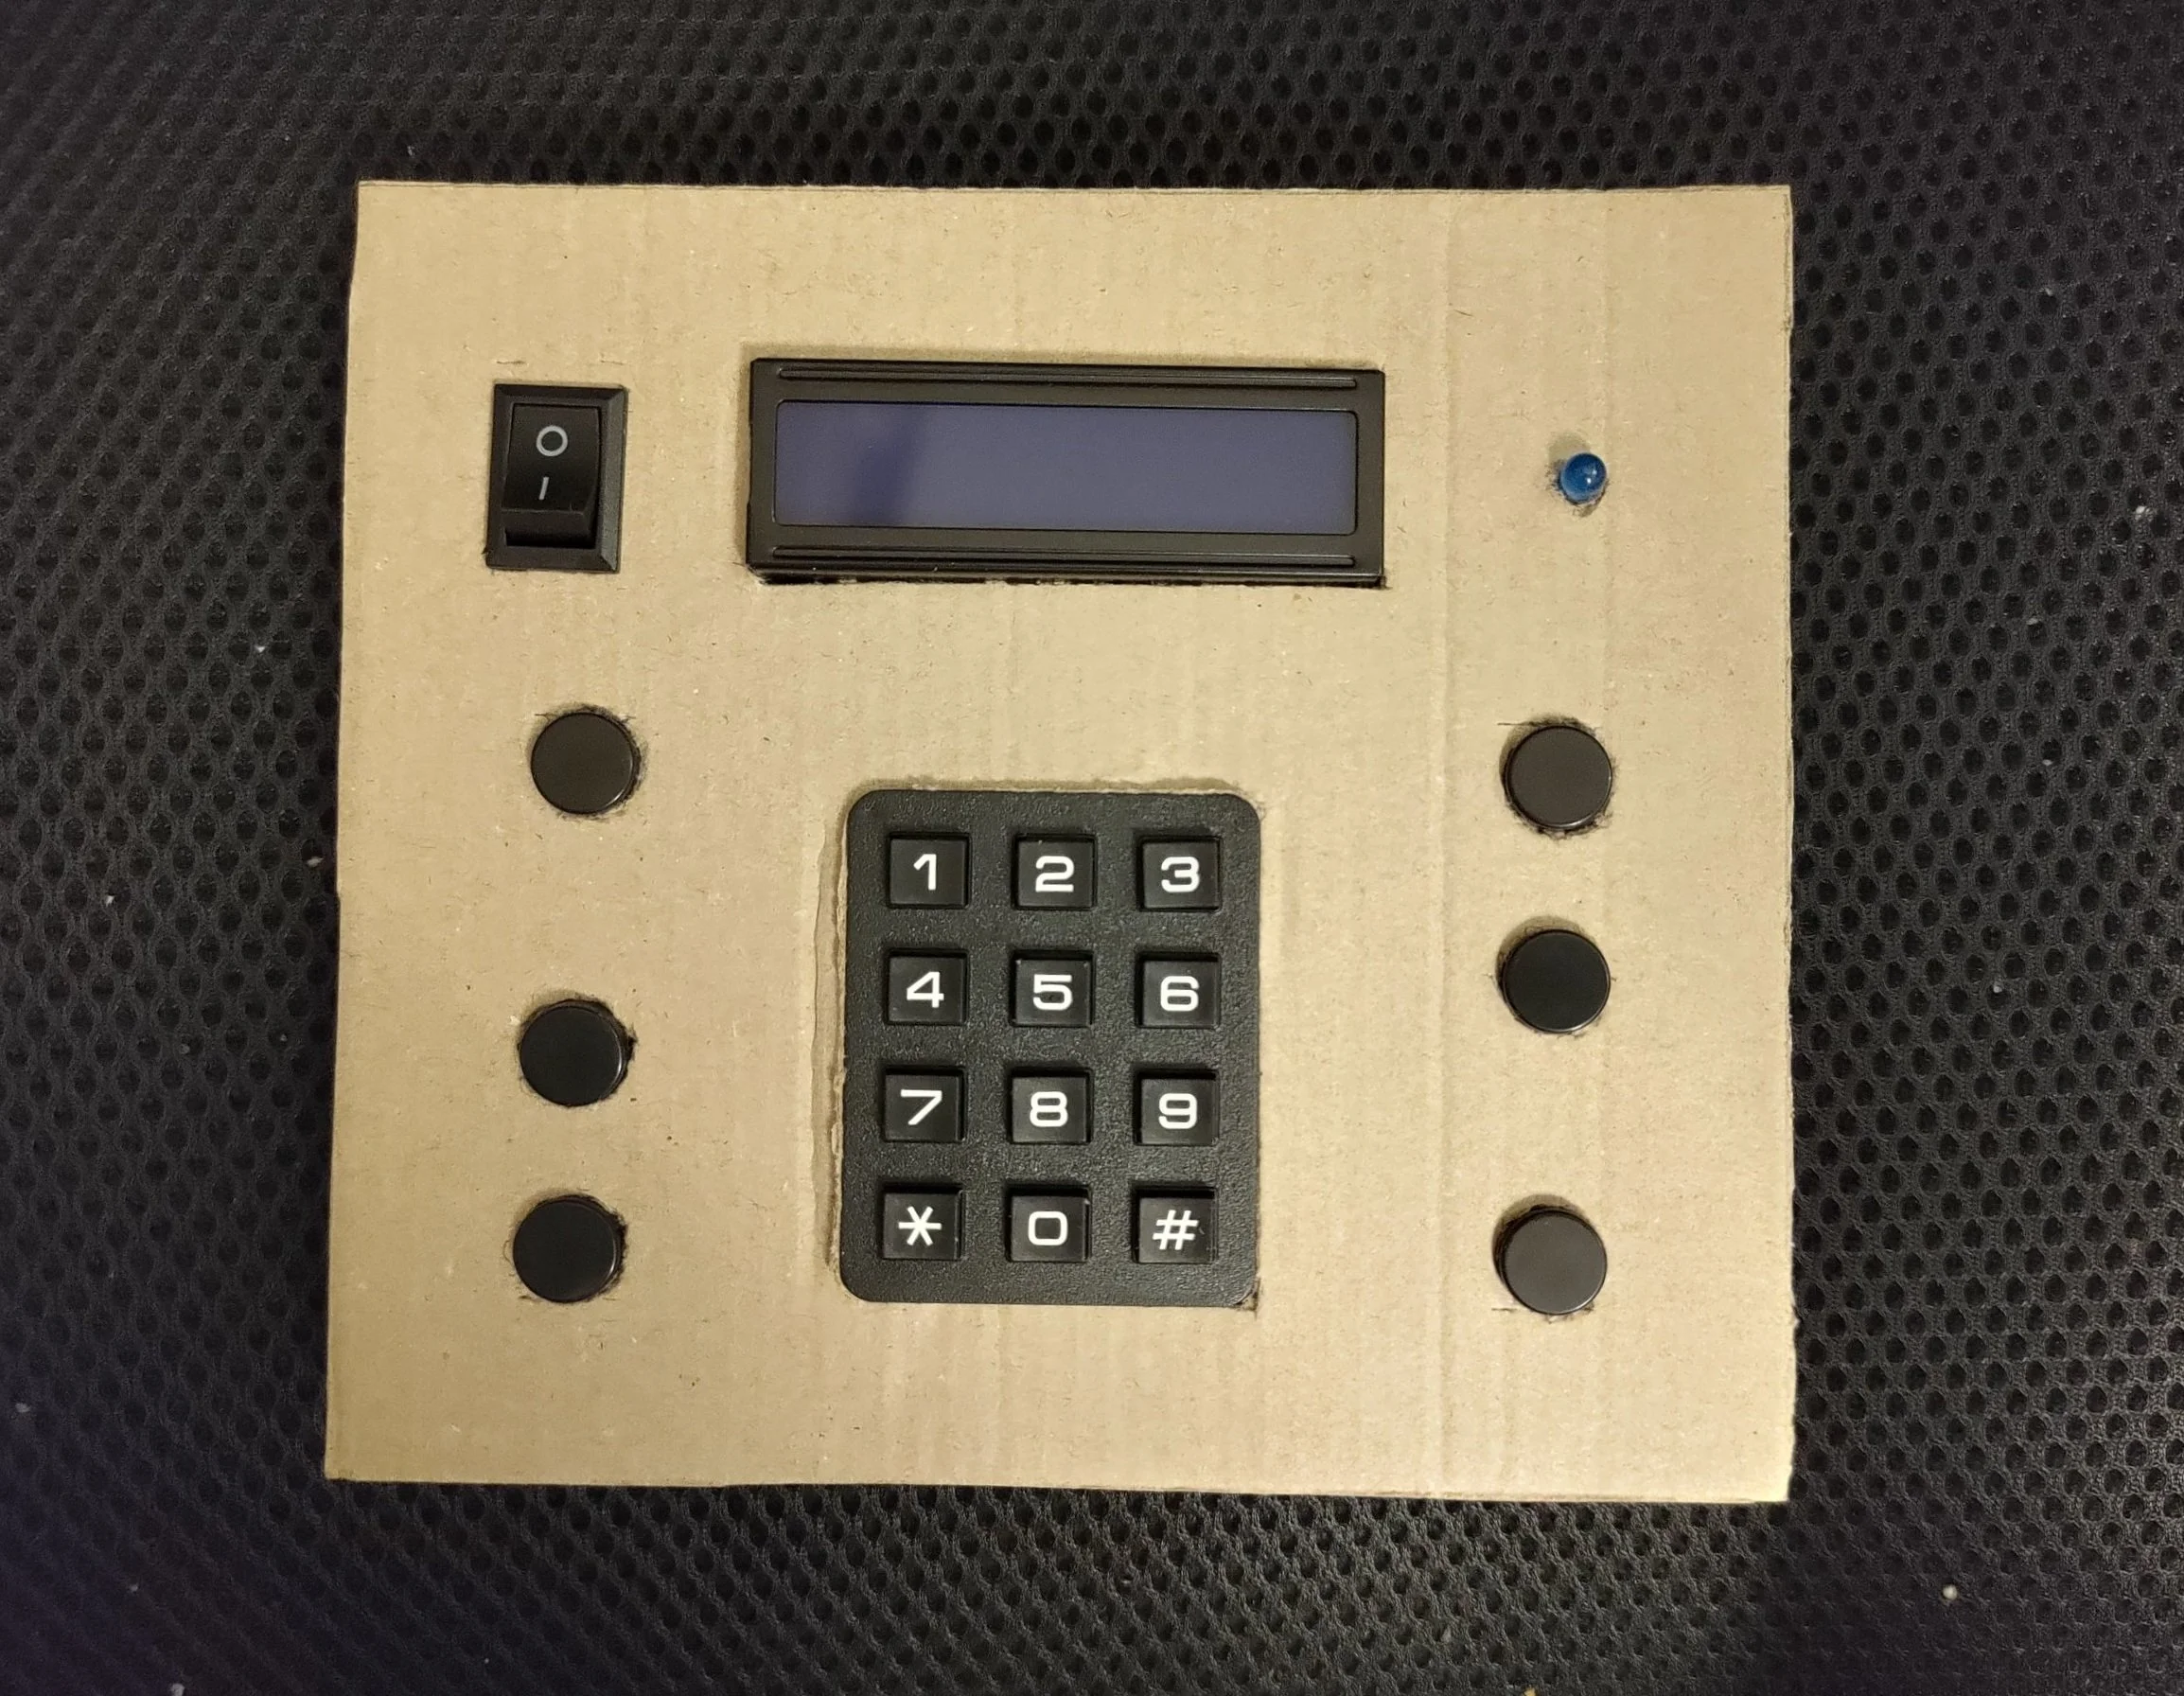
The main device body that securely houses the keypad, buttons and other user interactive elements.
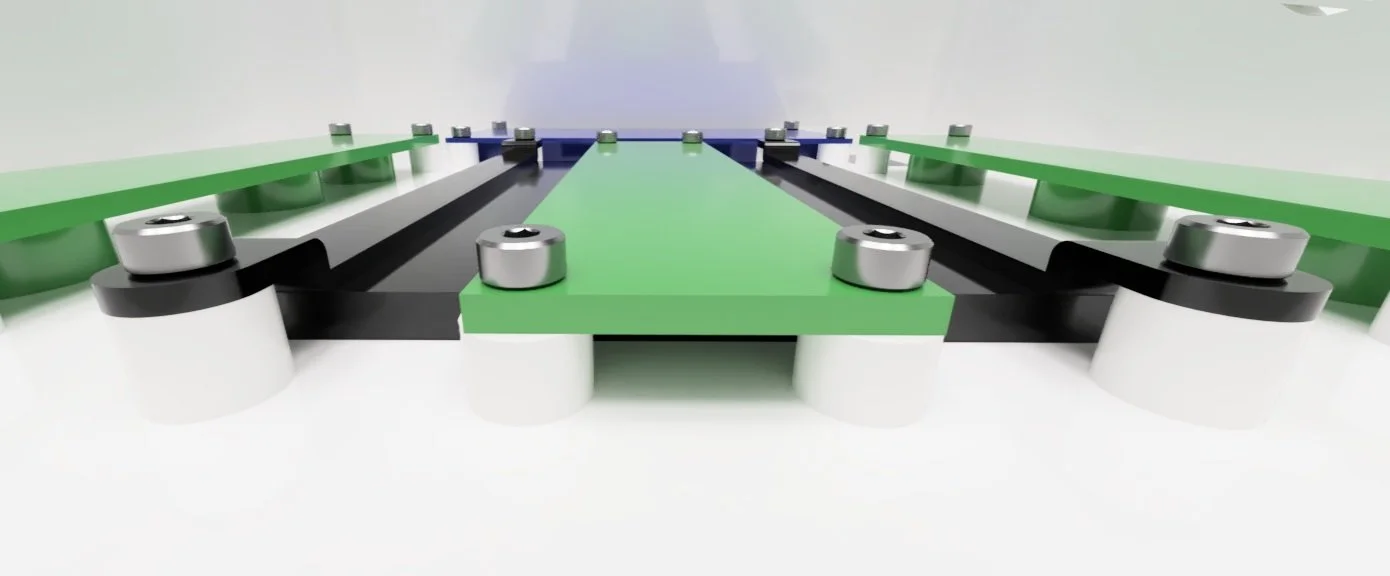
In order to mount all of the relevant components at the correct height, standoffs were placed throughout the inner side of the top surface. Making the top surface thick enough to mount some components resulted in other components being improperly mounted.
While the LCD and buttons could be mounted on standoffs, the keypad was too thin to mount in the same manner so brackets were used instead to hold the component against the inner surface of the shell.
Project Insights
In order to complete this project in a timely fashion, it was incredibly important to be flexible and quick to adapt.
I found myself refining my methods for conveying minute details, providing updates and asking for the right feedback. Achieving the balance between sharing as much information as possible without being overwhelming was crucial.
Given nature of the project, I made sure changes were easily reversible and documented. Utilizing fusion360’s parametric design tools and labeling dimensions and variables allowed for changes to be less disruptive and easier to implement.
Revision A approved for use on portfolio. Technical Drawings available at request.